








Why Does Liquid Blush Look More Natural Than Powder Blush and What Is the Difference Between Strobing and Contouring?

Blush and highlighter are two of the most misunderstood products in makeup. People either skip them entirely or go so heavy-handed that the result looks theatrical rather than polished. And if you have ever wondered why some people have that effortless flushed-from-within glow while your powder blush looks like two circles sitting on your cheeks, the answer is in the formula and the technique. Here is everything explained simply.
Why Does Liquid Blush Look More Natural Than Powder Blush?
The difference comes down to how each formula interacts with your skin.
Powder blush sits on top of the surface of your skin. No matter how well you blend it, it exists as a layer above your skin rather than within it. In natural light this can look slightly flat or obviously applied, especially if the powder catches in texture or dry patches.
Liquid blush behaves differently. Because it is water or gel-based, it sinks into the surface layer of skin before it sets. The result looks like the colour is coming from inside your skin rather than being placed on top of it. This is why liquid blush gives that flushed, just-been-outside glow that powder cannot quite replicate.
There are a few practical differences too:
- Powder blush is easier to control, easier to build up gradually, and easier to blend for beginners. It is also more forgiving because if you apply too much you can blend it out. It works best on normal to oily skin where the powder has a slightly matte surface to grip
- Liquid blush blends faster, looks more skin-like, and lasts longer because it sets into the skin rather than sitting on top. The trade-off is that it sets quickly so you need to blend immediately after applying. It works on all skin types but is especially flattering on dry skin where powder can look patchy
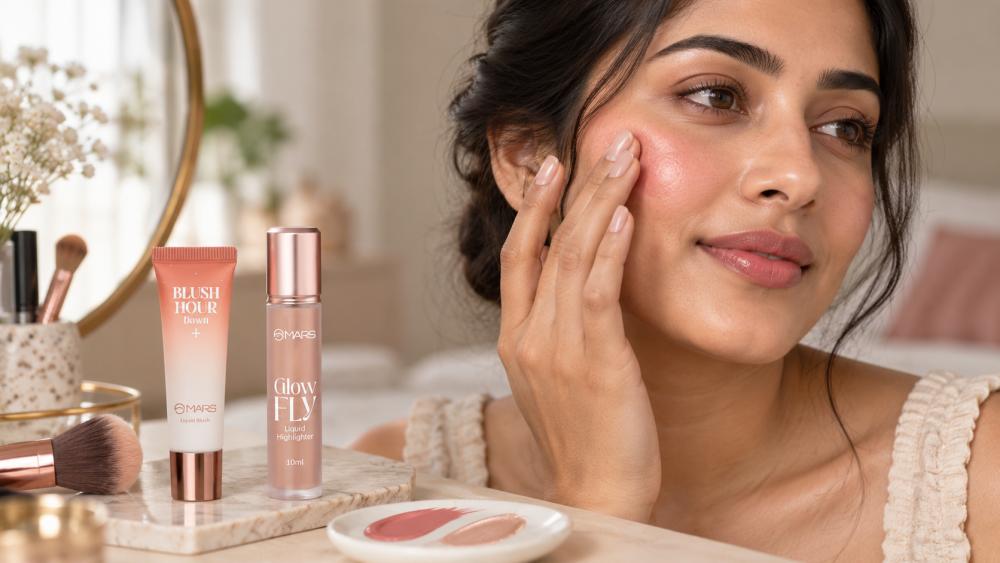
The MARS Blush Hour Liquid Blush captures exactly this skin-flushed effect, a lightweight gel formula that blends quickly and sets into a natural finish that does not look like blush from a distance, just healthy skin. See both liquid blush options in the MARS blush collection.
How to Apply Liquid Blush Correctly
This is where most people go wrong with liquid blush. The technique is different from powder.
Dab, not swipe. Put a small amount on the apple of your cheek and tap it in with your fingers or a damp sponge. Fingers are actually the best tool here because the warmth helps the formula blend faster. Work quickly because liquid blush sets in about 20 to 30 seconds. Apply less than you think you need because liquid blush is more pigmented than it looks in the bottle and builds fast.
What Is the Difference Between Strobing and Contouring?
These two techniques are often grouped together as if they are two halves of the same process. They are not. They are actually opposite approaches to the same goal, which is making your face look more dimensional.
Contouring
Contouring uses a shade darker than your natural skin tone to create shadow. Shadow recedes, so placing a darker shade in certain areas creates the illusion that those areas are set further back on the face. The classic contour points are the hollows under your cheekbones, the sides of your nose, the temples, and the jawline.
The goal of contouring is to sculpt, to make features appear sharper, more defined, or slimmer depending on where you place the product.
Strobing
Strobing does the opposite. Instead of adding shadow to recede areas, strobing adds light to bring areas forward. You apply a highlighter or illuminating product only to the high points of your face, which are the tops of your cheekbones, the bridge of your nose, the brow bone, the cupid's bow, and the inner corner of the eyes. These are the areas that naturally catch light on a three-dimensional face.
The goal of strobing is not to sculpt but to illuminate, to give your skin a lit-from-within glow without the effort of a full contour routine.
Which One Should You Use?
If you want defined, sculpted cheekbones and a slimmer-looking face, contour. If you want a glowy, radiant finish without heavy product, strobe. Most people who look like they have great bone structure in photos are doing both together, shadow beneath the cheekbone and highlight on top of it.
The MARS Glowfly Liquid Highlighter is built for strobing specifically, a liquid formula that catches light naturally and gives a genuine glow rather than a glittery finish. Because it is liquid it blends seamlessly into the skin and sits at the high points without sitting in texture. Find it alongside the Northern Lights pan highlighter in the MARS highlighter collection.
Blush and Highlighter Placement - Quick Guide
| Product | Where to Place | What It Does |
|---|---|---|
| Liquid blush | Apple of cheeks, blend upward | Natural flush, skin-like finish |
| Powder blush | Cheekbones, sweep back toward temples | More controlled, buildable colour |
| Highlighter (strobing) | Top of cheekbones, brow bone, nose bridge, cupid's bow | Brings areas forward, adds glow |
| Contour | Hollow of cheeks, temples, jawline, sides of nose | Creates shadow, defines structure |
Do You Need Both Blush and Highlighter?
You do not need both for every look but together they create something neither can do alone. Blush adds warmth and life to the skin. Highlighter adds dimension and light. Without blush, highlighter can look cold and isolated on the face. Without highlighter, blush adds colour but the skin can still look flat.
The quickest combination for a natural everyday glow is to dab liquid blush on the cheeks and tap a small amount of liquid highlighter on the top of the cheekbone just above where the blush ends. Two products, 30 seconds, and your face has dimension and warmth that looks completely natural.
The Bottom Line
Liquid blush looks more natural than powder because it sets into the skin instead of sitting on top of it. Strobing is about adding light to high points of the face. Contouring is about adding shadow to recede areas. Neither technique is complicated once you understand what each product is doing and why, and both can be done quickly once you know your placement points.


