Setting Up and Calibrating Your MagTek Card Reader Step-by-Step

For businesses that rely on secure, efficient payment systems, properly setting up and calibrating card readers is critical to ensuring smooth transactions. The MagTek card reader is one of the most trusted devices in the industry, known for its reliability, security, and compatibility with a wide range of point-of-sale systems. Whether you’re integrating it into a retail environment, an office, or a mobile business, properly setting it up helps prevent errors, improve data accuracy, and enhance overall performance. This step-by-step guide walks you through installation, configuration, and calibration, ensuring your MagTek device functions flawlessly from day one.
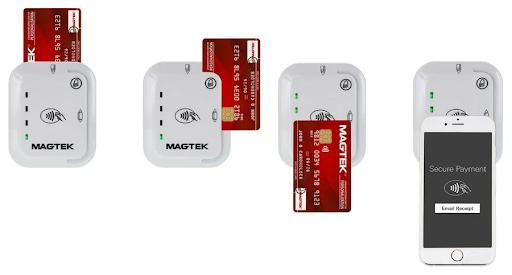
Understanding the MagTek Card Reader
Before diving into setup, it’s essential to understand what makes MagTek devices unique. MagTek specializes in magnetic stripe and chip card readers designed for secure financial transactions. These devices can read data from credit, debit, and gift cards, and are often used in retail, hospitality, and service industries.
Features and Functionality
The MagTek card reader supports multiple connection types, including USB, Bluetooth, and serial interfaces. It’s designed to be compatible with various operating systems, including Windows, macOS, and specific mobile platforms. Additionally, MagTek integrates encryption features that protect cardholder data during the transaction process, aligning with PCI compliance standards.
Step 1: Unboxing and Checking Your Equipment
When you receive your MagTek reader, inspect the package first. Ensure that all necessary components are included, such as:
- The MagTek card reader unit
- Connection cable (USB or other type, depending on your model)
- Installation manual or quick-start guide
- Optional software CD or download link
Carefully check for any visible damage to the reader or cables. If any parts appear damaged, contact the supplier before proceeding with installation.
Step 2: Connecting the Device to Your System
Once you’ve confirmed all parts are in good condition, you can connect the reader to your computer or point-of-sale terminal.
For USB-Connected Devices
Plug the reader’s USB cable into an available port on your device. Wait a few seconds for your operating system to automatically recognize the reader. In most cases, drivers are installed automatically. If not, refer to the MagTek support website to manually download and install the latest drivers.
For Bluetooth or Wireless Readers
If your model supports Bluetooth, turn on the device and put it into pairing mode. On your computer or POS system, open Bluetooth settings, search for available devices, and select your MagTek reader. Once connected, confirm that the pairing was successful by testing a sample card swipe.
Step 3: Installing MagTek Software and Drivers
To ensure full functionality, it’s essential to install MagTek’s official software and driver suite. This includes configuration utilities and diagnostic tools that allow you to monitor and test the reader’s performance.
- Visit the official MagTek website and locate the Support or Downloads section.
- Select your card reader model from the list.
- Download and install the latest drivers and configuration tools.
- Restart your computer or POS terminal to finalize installation.
After installation, launch the configuration utility to confirm that your device is recognized and operating correctly.
Step 4: Calibrating the MagTek Card Reader
Proper calibration ensures accurate card data reading and minimizes transaction errors.
How to Calibrate
- Open the MagTek configuration software.
- Navigate to the Device Settings or Calibration tab.
- Follow the on-screen prompts to begin calibration. Typically, this involves swiping a test card several times to ensure consistent data capture.
- Adjust sensitivity settings if needed — this helps the reader accurately detect magnetic stripes or chip contacts.
- Save the configuration and run a final test swipe to confirm accuracy.
Regular calibration—especially in high-use environments—keeps your reader performing at peak efficiency and prolongs its lifespan.
Step 5: Testing the Device for Accuracy
After calibration, test your MagTek reader by performing multiple card swipes. Verify that each transaction is processed smoothly and that no data transmission errors occur. If you encounter issues such as misreads or incomplete data, check your connections, re-run the calibration process, or reinstall the drivers.
Step 6: Maintenance and Troubleshooting Tips
To maintain long-term reliability:
- Clean the magnetic head periodically with approved cleaning cards.
- Avoid exposure to dust, moisture, or extreme temperatures.
- Ensure firmware is up to date by regularly checking MagTek’s website.
- If you experience connectivity issues, test your cables and ports before contacting technical support.
Routine maintenance not only extends the lifespan of your reader but also ensures continuous transaction security.
Conclusion
Properly setting up and calibrating your MagTek payment device is essential for seamless payment operations. From installation and software setup to calibration and maintenance, each step plays a key role in ensuring secure and error-free transactions. Taking the time to configure your device correctly not only enhances performance but also protects sensitive customer data.
For businesses looking to create a smooth, professional checkout experience, pairing your MagTek reader with a reliable card payment machine setup can elevate efficiency and customer satisfaction — providing a strong foundation for secure, dependable payment processing.